Configure DKIM Exchange Online
Security has been major concern and email has been one of the most vulnerable application. Anyone inside the organization who has been block with internet can also be penetrated with email. And as of today, technology, creating spam/spoof email or email with malware has been too easy. So, to make your email more secure office 365 has been giving a protection of DomainKeys Identified Mail (DKIM). On this blog we will be looking after how we can configure DKIM and DMARC for Exchange Online.
To configure the DKIM, we need to get to our Exchange Admin Center. Click on ‘Protection‘ and click on ‘DKIM‘ Tab. On this screen you will be listed down with all the domain associated with your tenant. Select the domain for which you want to enable the DKIM and click on Enable.
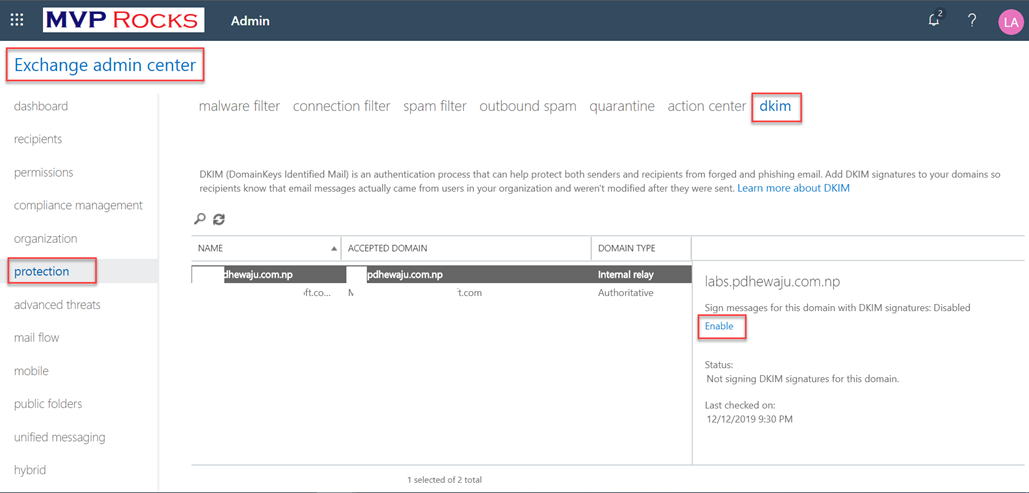
Once you click on ‘Enable‘ you will get the message that you need to add these two CNAME on your Domain DNS.
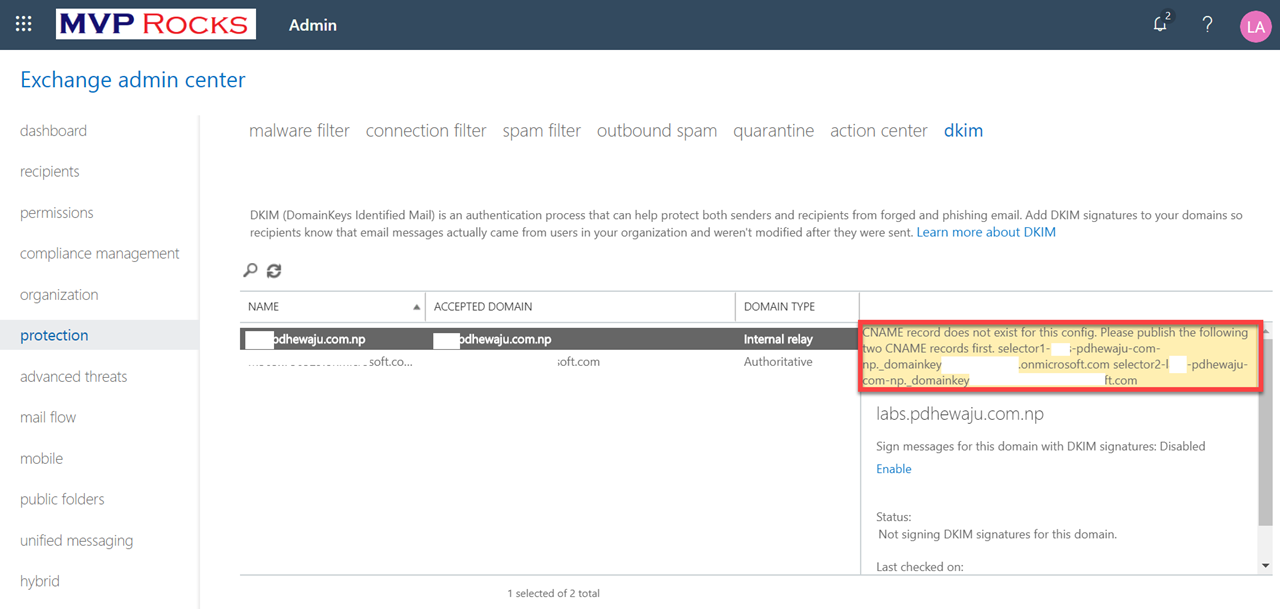
You will get a message like this
CNAME record does not exist for this config. Please publish the following two CNAME records first. selector1- pdhewaju-com-np._domainkey.pdhewaju.onmicrosoft.com selector2 -pdhewaju-com-np._domainkey.pdhewaju.onmicrosoft.com
To add record on DNS use this format.
For Selector 1
Host name:                     selector1._domainkey

Points to address or value:    selector1-<domainGUID>._domainkey.<initialDomain>

TTL:                           3600
For Selector 2
Host name:                     selector2._domainkey

Points to address or value:    selector2-<domainGUID>._domainkey.<initialDomain>

TTL:                           3600
For E.g.
Selector 1 for domain pdhewaju.com.np

Host name:                     selector1._domainkey

Points to address or value:    selector1-pdhewaju-com-np._domainkey.pdhewaju.onmicrosoft.com

TTL:                           3600

Selector 2 for domain pdhewaju.com.np

Host name:                     selector2._domainkey

Points to address or value:    selector2- pdhewaju -com-np._domainkey. pdhewaju.onmicrosoft.com

TTL:                           3600
As I have been using Azure DNS service for this domain, here is the way that I have used to add DNS

And this is how it looks like once I have done with addition of these two CNAME’s

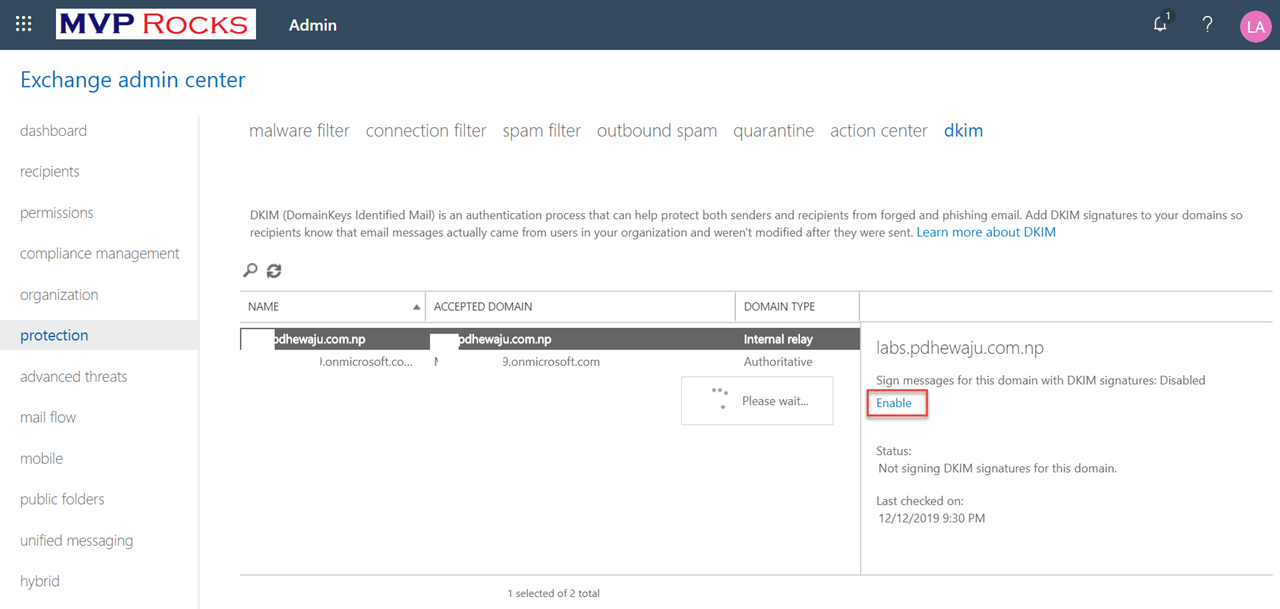
Now get back to your Exchange admin Center, once these records get published in domain. Now click on selected domain for which you have added these CNAME’s and click on ‘Enable‘.
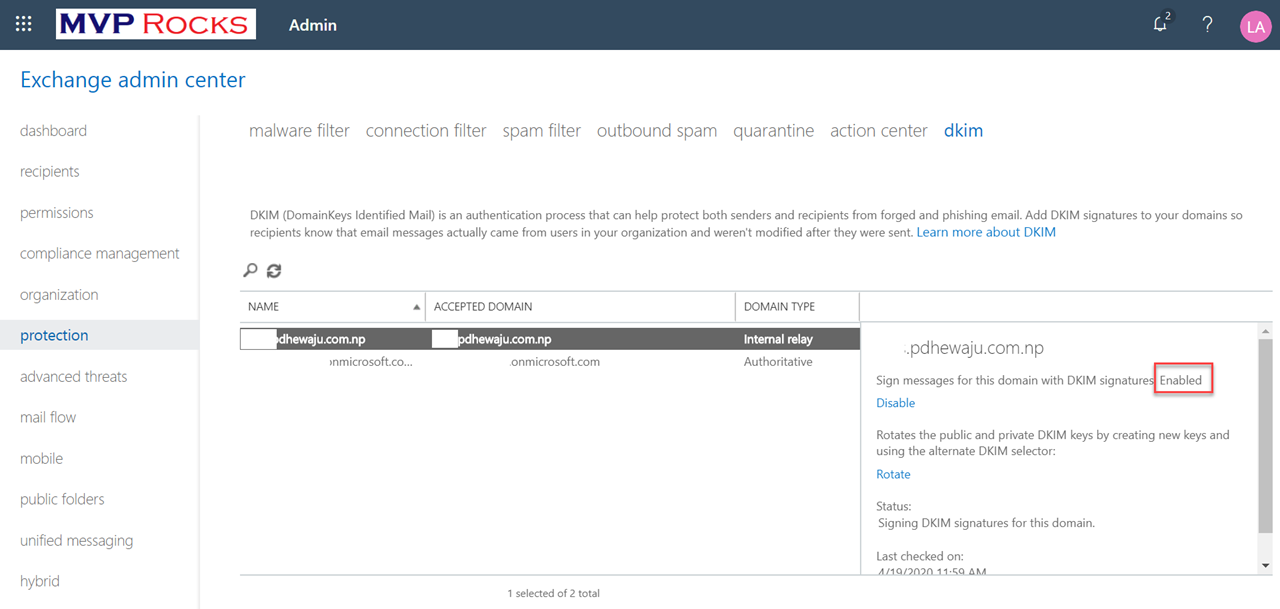
Now you can see it has been enabled. And you email is secured by DKIM 😀
Hope this blog will help you to get your email secure using DKIM. On my next blog I will be talking about DMARC configuration for Office 365.
![[Solve]The fully qualified domain name for node could not be found.](/wp-content/themes/ribbon-lite/images/nothumb-related.png)
[Solve]The fully qualified domain name for node could not be found.
ExAssertException issue on Exchange OWA
Configuring Virtual Directories on Exchange 2016.
About Author
pdhewjau
Prashant Dhewaju is a Microsoft MVP and Microsoft 365 Adoption Consultant with deep expertise in cybersecurity and modern workplace solutions. He advises organizations across Nepal and the broader region on securely adopting Microsoft 365, improving productivity, strengthening security posture, and driving effective change management. His prior position as a Modern Work Security Specialist at Microsoft saw him providing invaluable guidance to major clients in Bangladesh, Brunei, Cambodia, and Myanmar, assisting them with their foundational security needs. Awarded the esteemed Microsoft Most Valuable Professional (MVP) accolade in 2017, Prashant is recognized globally among Microsoft peers. Since 2010, he has imparted his expertise as a Microsoft Certified Trainer (MCT), conducting specialized training across Nepal.