Configuring Virtual Directories on Exchange 2016.
This is one of the most customizing part of the Exchange Server, whether it be 2007 or 2010 or 2013 or 2016. Any version we install we always change this portions… so why??? Would be the question. Virtual Directory links you with your Exchange server portal, and you don’t like it to be ‘EXGServer.pdhewaju.com.np‘ or ‘localhost.pdhewaju.com.np‘ or any other which is not generic. You want it to be simple and easy so that every user in your organization can assess your email server with names like ‘mail.pdhewaju.com.np‘ or ‘webmail.pdhewaju.com.np‘. Again if you are going to use such names while communicating with internet, you need to have a public domain hosted else you will not be able to access your email through internet.
Although the Virtual Directories configuration on Exchange 2016 is similar to the Exchange 2013. Let’s move with the configuration portion of its. I hope you are already been my previous Blog of Installing Exchange Server 2016 . Where we had a complete installation of Exchange Server and we have also check how to open our Exchange Control Panel for Exchange 2016.
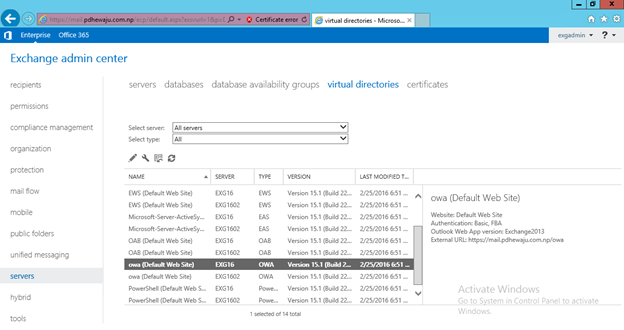
First of all, Let’s us open our Exchange Control Panel (ECP), Select the Server on Left-Panel of ECP and then Select on ‘Virtual Directories’ Tab. Once you select the ‘Virtual Directories’ you can see a lot of options coming down on the Middle Panel. On the Middle Panel, you can see a configuration ‘owa (Default Web Sites)’ Select it and Double-click it to configure.
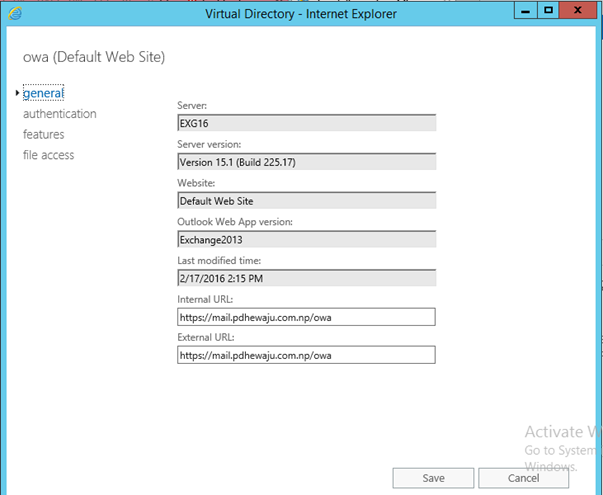
A new window will get open with the details of Exchange OWA. Edit the portion with Internal URL and External URL asper required portal name to access exchange server. Here I have named both same ‘https://mail.pdhewaju.com.np/owa’ and click on Save.
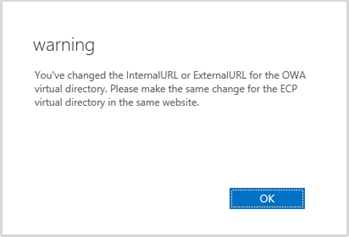
A Warning will get open, once you click on Save. Click on Okay.
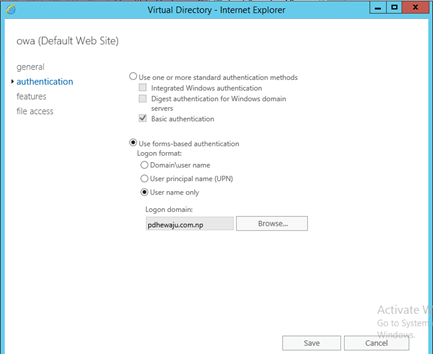
As we are still on the configuration window of the virtual directory, I am changing my authentication type over here. I want to make user get logon only using his/her username only, don’t want to make him/her to type full email address or user address. So I clicked on the Authentication option on left panel.
Over there on the middle panel, you can see ‘user forms-based authentication’ on which select ‘User Name only’, Click on Browse and Select your domain. After the completion of configuration, click on Save.
Those were the configuration which we did on Exchange Control Panel, only making change on Exchange Control Panel will not help us for the redirection of the web address for web outlook access. So we need to do some tasks on ‘IIS manager’. Hence let’s get to IIS server and configure it. J
To Open ‘IIS Manager’ click window button on left corner of screen and type IIS Manager, this will search you IIS Manager to start.
Once ‘IIS Manager’ gets open,
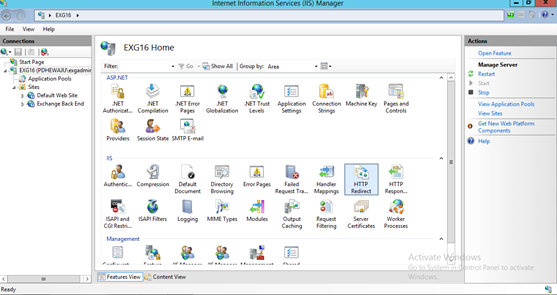
- Expand to ‘Default Web Site’ and select HTTP.
- Click on ‘Open Feature’ under Actions.
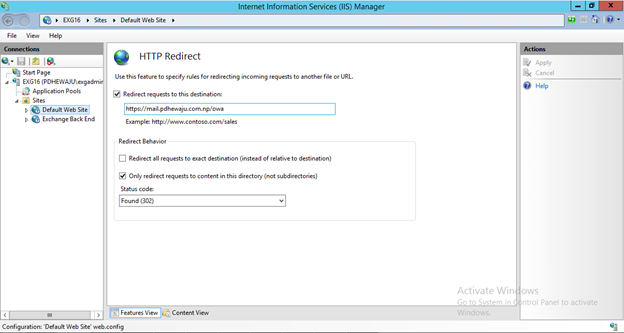
On HTTP Redirect, type same name you have given on OWA ‘Virtual Directory’. Make sure to check on ‘Only redirect requests to content in this directory (not Subdirectory).
After completion of this, Follow the process to remove adverse effect follow the following steps
- Expand the Default Web Site.
- Select the aspnet_client virtual directory.
- Double-click HTTPRedirect.
- Clear the check box for Redirect requests to this destination.
- Click Apply to save the settings.
-
Repeat steps 2-6 for the following virtual directories:
- Autodiscover
- Ecp
- EWS
- Microsoft-Server-ActiveSync
- OAB
- Owa
- PowerShell
- PowerShell-Proxy
- Rpc
- Autodiscover
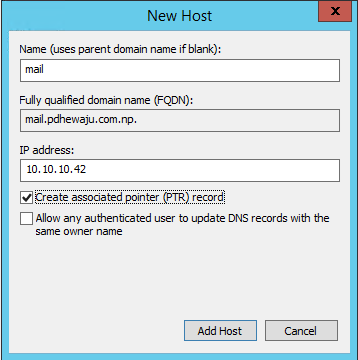
Now the thing is, as we have redirected our email Brower to ‘mail.pdhewaju.com.np’, we need to add one HOST A or CNAME Record to the DNS Server related to specific redirection i.e. ‘mail.pdhewaju.com.np’
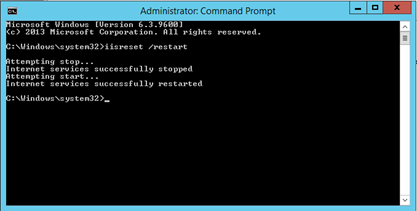
Once Everything is completed, we need to restart our IIS Services. To Restart IIS, use ‘IISreset /restart’ command as of below snap.
Hope this will help you guys 🙂
