Installing and Configuring Domain Controller on Server 2012 R2
Installing and configuring a Domain controller might be a piece of cake to anyone, we can just to go google or YouTube and with the few clicks, there BOOM our domain controller is ready to go live. But have we ever thought the domain controller which we have installed and configured is proper??? Is it working with standard practice??? That is what we need to think while configuring domain controller, Because Domain controller are the back-bone of the any Microsoft technologies that we will be implementing in our organization. It might be Exchange, System Center or Skype for Business or any other product of Microsoft. Hence I am trying to share my knowledge of proper configuration of Domain Controller through this Blog. Hope this will help out you guys a lot. 🙂
Installing a Domain Controller is just enabling a Role name “Active Directory Domain Controller” available on the server. But before going to make this role enable, there are few perquisites that we need configure first. Let’s say about the Naming convention, before we install ADDS, we need to make sure that our domain controller does have a correct name. Because once we promote this machine to the domain controller, we cannot change its name and also this is not a good practice. Hence we first make sure we do have a correct name of the domain controller.
These Naming convention can of different types. Naming Convention for the Server will make easiness to identify the server role, responsibilities, location and importance just on a name. These can example for servers.
-
<Location ID><Role><Version><number> i.e. HORDC12R201/ HODC12R201
Where HO is Location I.e. Head Office
RDC/DC is the role i.e. Root Domain Controller/ Domain Controller
12R2 is the version &
01 is the number of domain controller.
- <location ID><OStype><Role><number> i.e. HOWS2K12R2DC01
Once Name to the server is provided as per the naming convention, next thing is to make sure it gets the correct IP for the communication. OH! I might have forgot to say that, if NIC of the Server is not plugged or no Ethernet connection, you are not able to Install ADDS role on the server. 😀
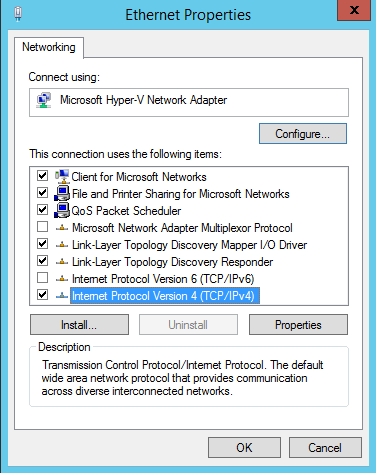
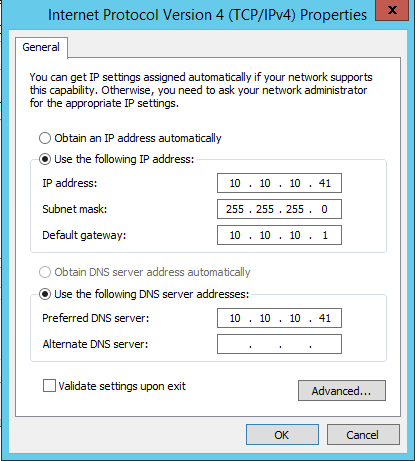
Configuring IP is not a big deal. We can just go to the Network, double click on the Network Adaptor and go to the properties, where we select IPv4 Option and go to its properties as of the snap. If you can see on my snapshot, I have not selected IPv6 because it is not recommended practice :D. it might interrupt your DNS pointing hence we mostly deselect it unless it is required.
I have provided the IP over here as per my Networking.
I have already configured the prerequisite that I have explained above on this blog, now let’s get into the main course. Hope we will have a nice time ahead on this.
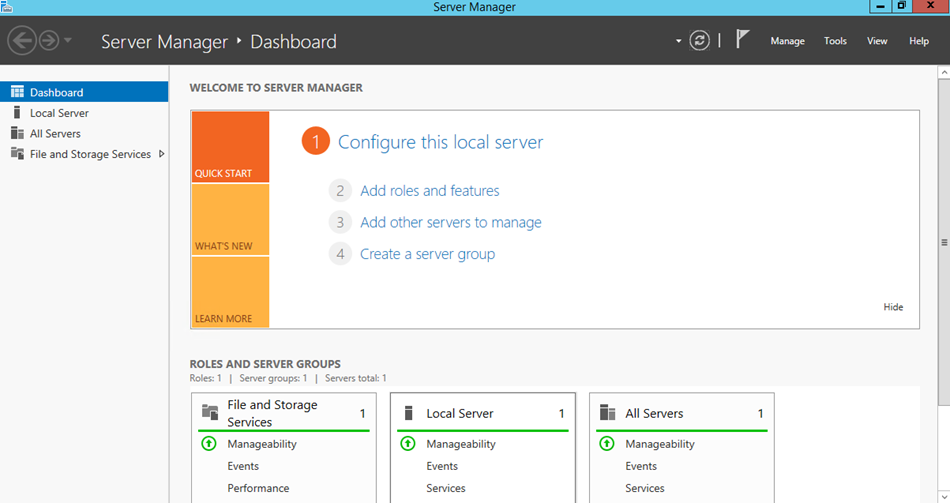
- 1. Go to the Server Manager Dashboard, on the middle panel, Click on ‘Add roles and features’.
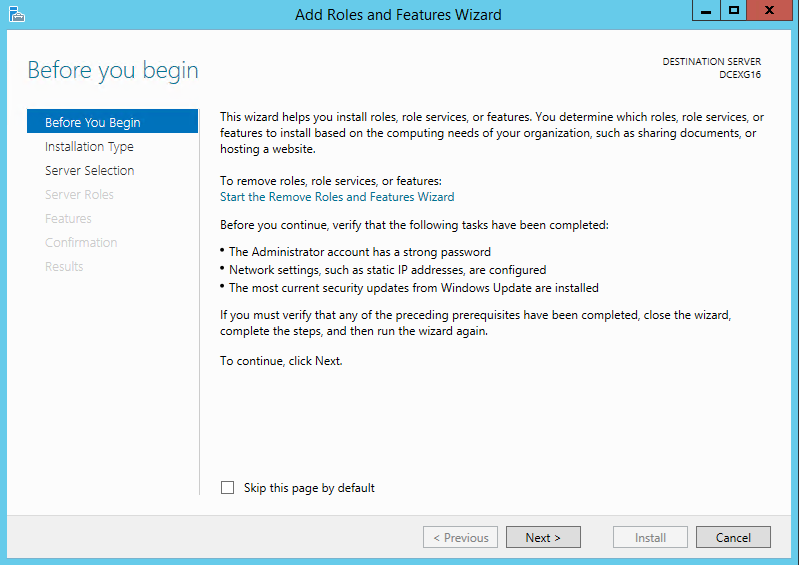
- 2.I just skipped this part and clicked on next.
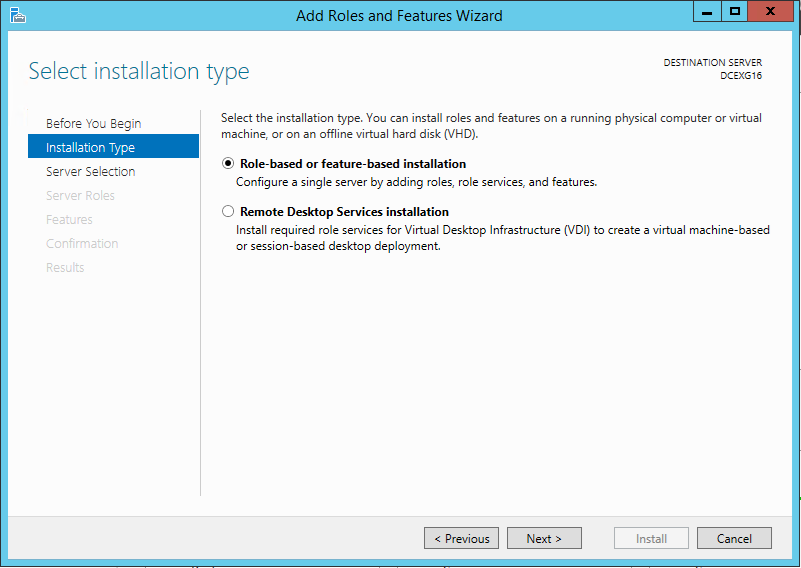
- 3.Selected “Role-based or feature-based installation” and clicked on Next.
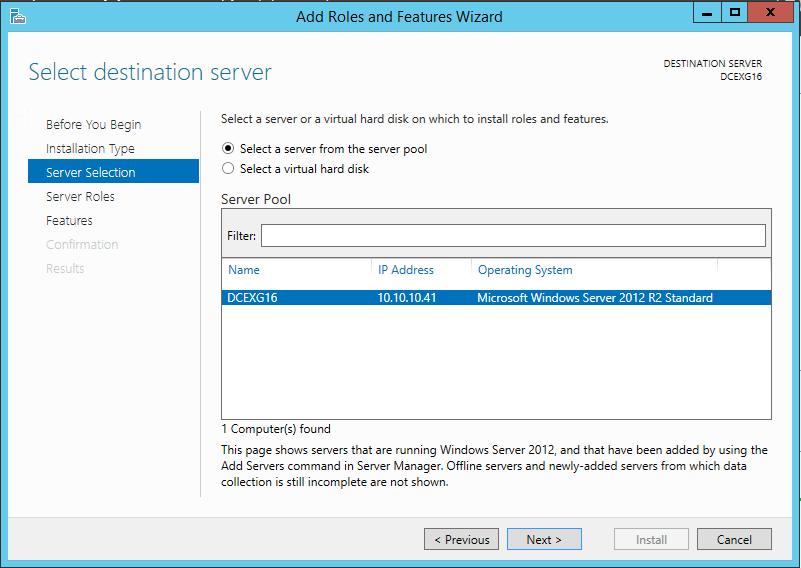
- 4.On Server Selection Menu Selected my server and clicked on ‘Next’.
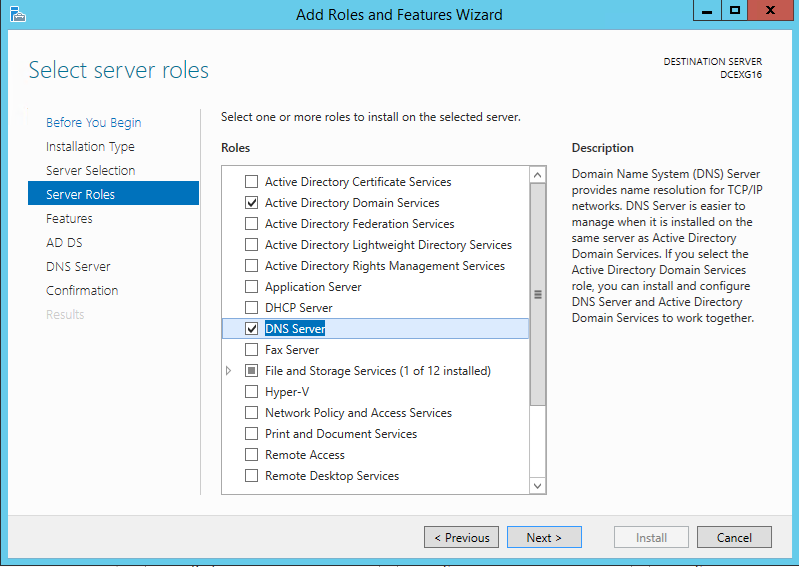
- 5.As mentioned previously, “Active Directory Domain Service” is just a role on server. Which I have selected on below of my snap and if you don’t miss, I have selected “DNS Servers” too. Why??? Simple because I don’t have any DNS Server which is required for Domain Configuration. And also like to mention over here that “DCPROMO” command does not work anymore on Server 2012 and above
L
- . That’s pretty sad news for us.
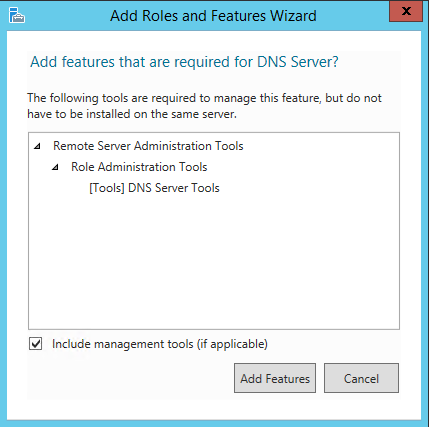
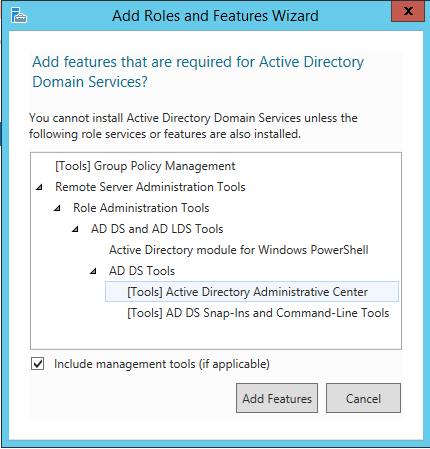
- 6.While Selecting Above options, there might be some pop-up of these two additional features which need to be installed too. Hence just click on “Add Feature” for this pop-ups.
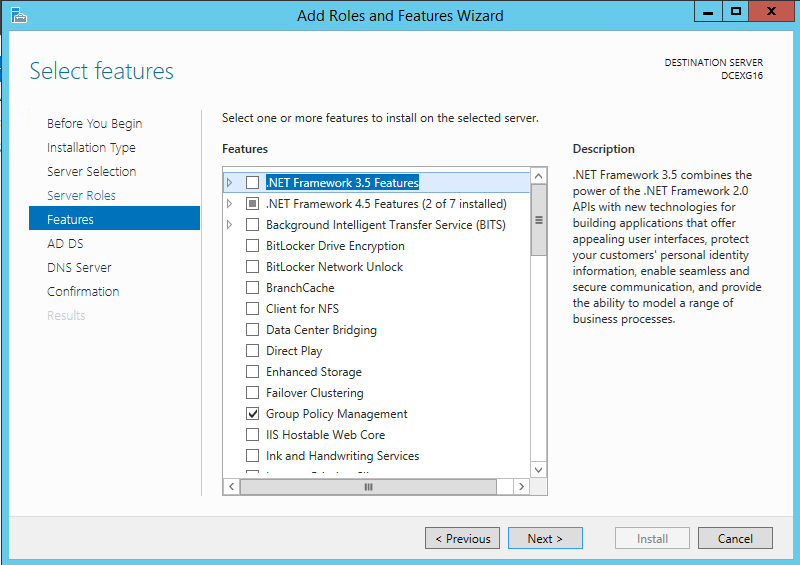
- 7.On Features, just click on “Next” if you don’t have to select any. For me I didn’t need any so just clicked on “Next”.
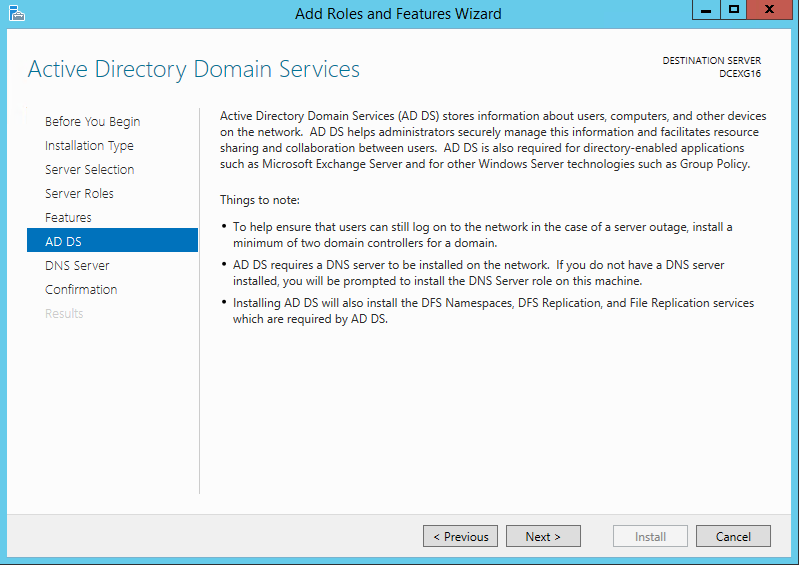
- 8.On this screen, there comes some description saying about the “Active Directory Domain Services”. Nothing much to do so, I clicked on “Next”.
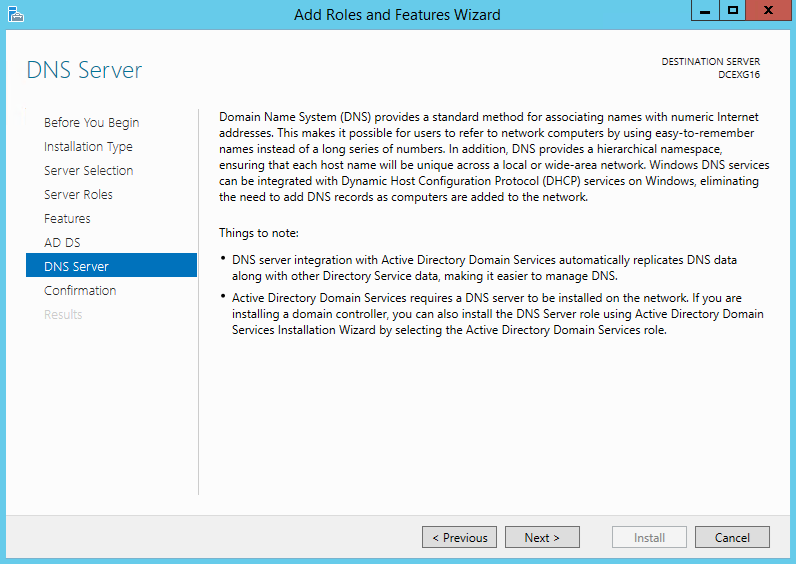
- 9.Same goes to the “DNS Server” role too, Hence over here also I clicked on “Next” and moved ahead.
- 10.Confirmed the Installation process, and clicked on “Next”.

- 11.It Might take few minutes to complete this configuration. Once this is complete, I saw some comment saying additional steps required to make this machine a domain controller, hence I clicked on “Promote this server to a domain controller” to further configure.

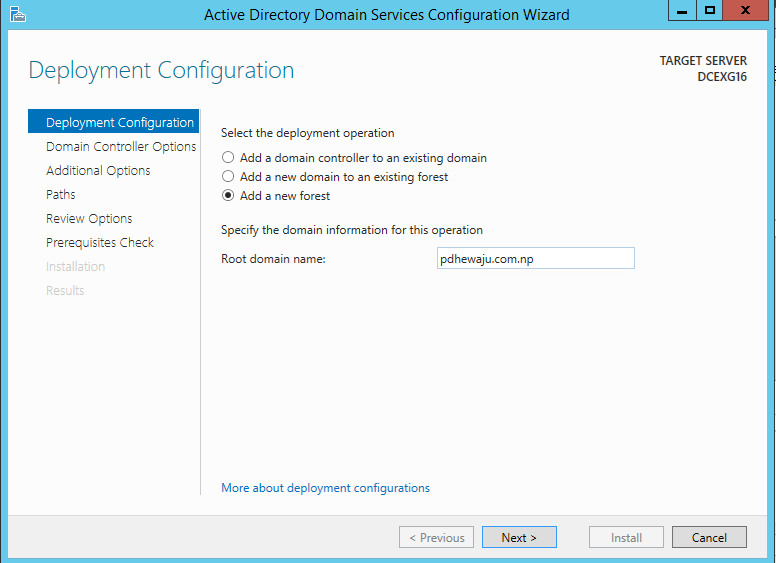
- Add a Domain Controller to an existing domain
- Add a new domain to an existing forest
- Add a new forest
As of I don’t have any domain controller, option ‘a’ and ‘b’ are worthless to me. Hence I selected a third option ‘Add a new forest’ provided a new forest name. OK! Over here also once you freeze the Root Domain Name, you will not be able to change it as of domain controller name. hence be sure you do have correct domain controller name.
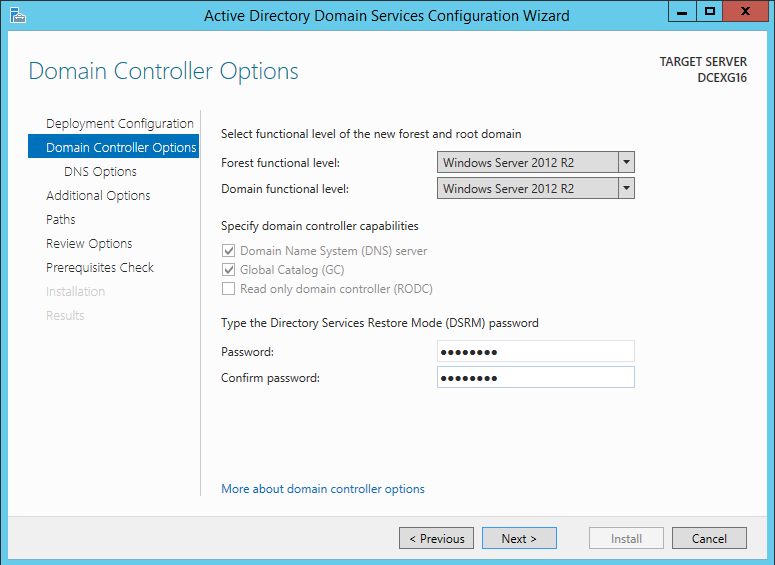
- 13.Forest Functional Level and Domain Functional level is quite important thing; Better I explain details on this. I would like to refer this to
- . There you have a better explanation which functional level you need to choose and what advantages you will be getting it. Over here I have selected the latest one. And I do have a ‘DSRM’ password too, which I will be using while recovering the domain controller.
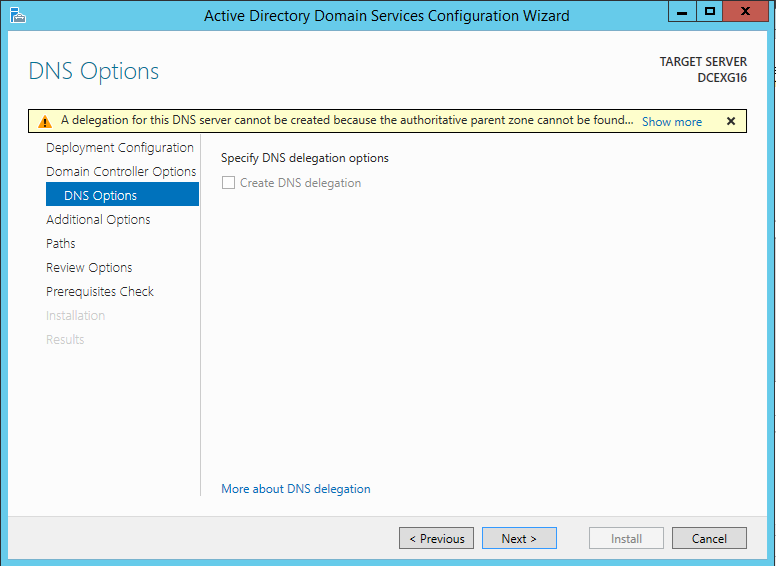
- 14.Clicked Next on “DNS Options”. No more or further on this to go.
- 15.Domain Controller checks, if you do have same name of domain or not in your environment previously and provide you a NetBIOS name. which we can use on user logon procedure to domain controller, we will be discussion on this later.

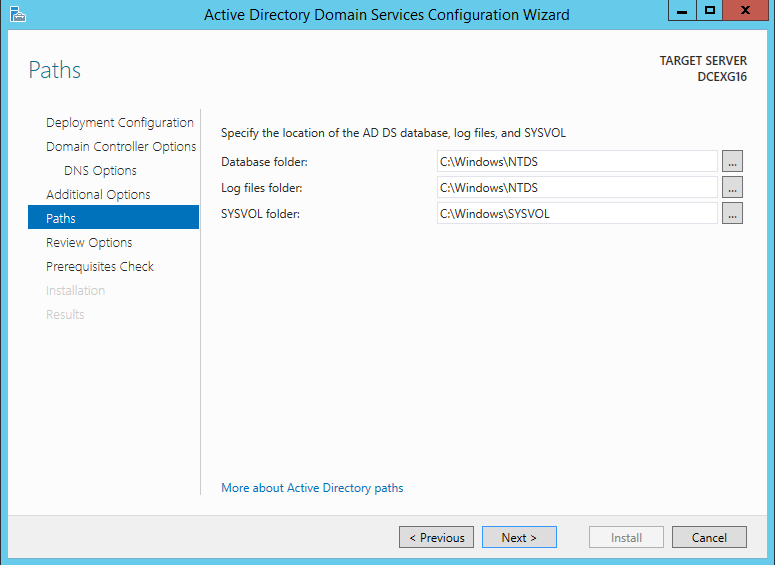
- 16.This is the core component of the “ADDS”, where we define at which location we will be storing our “ADDS” database. So my recommendation for it will be C: Drive rather than any other drive or more specifically default location. Basically this is all about the trade off, if you have located this database on the default location you will have better performance but if your C Drive crashes you need to restore from Backup. And if you change the location there might be slightly issue with your performance but easy to restore the database. Hence it is up to the IT Admin team to select which one they want to go with.
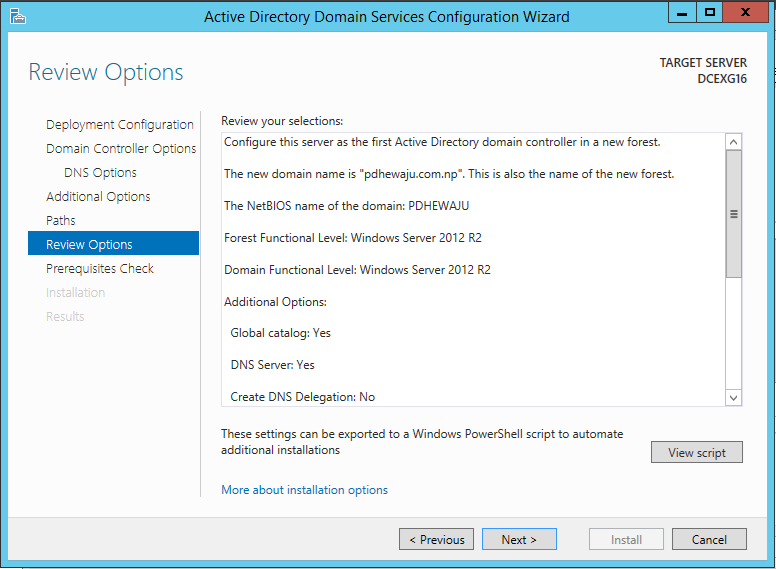
- 17.Check the Review option, if everything is going as per planned or not? If this is okay, let’s move clicking on ”Next”.
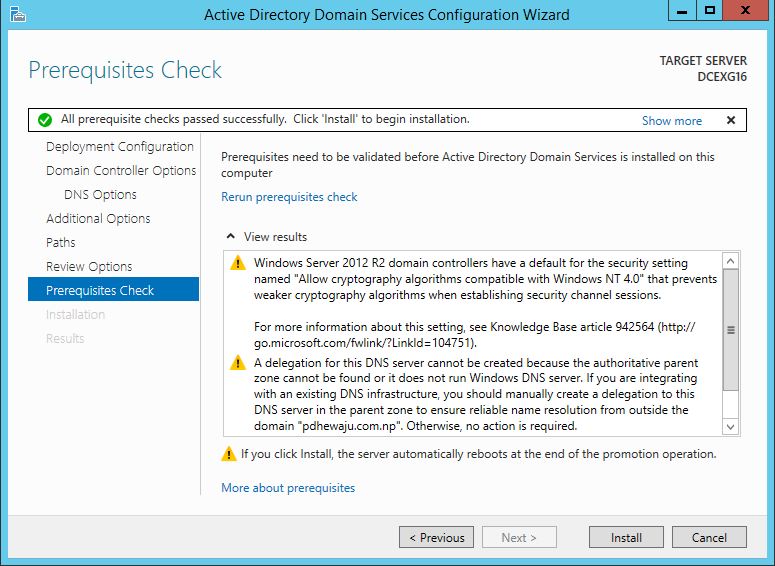
- 18.Check if I do have proper configured prerequisites or not? Once passed this place we can Install the domain controller.
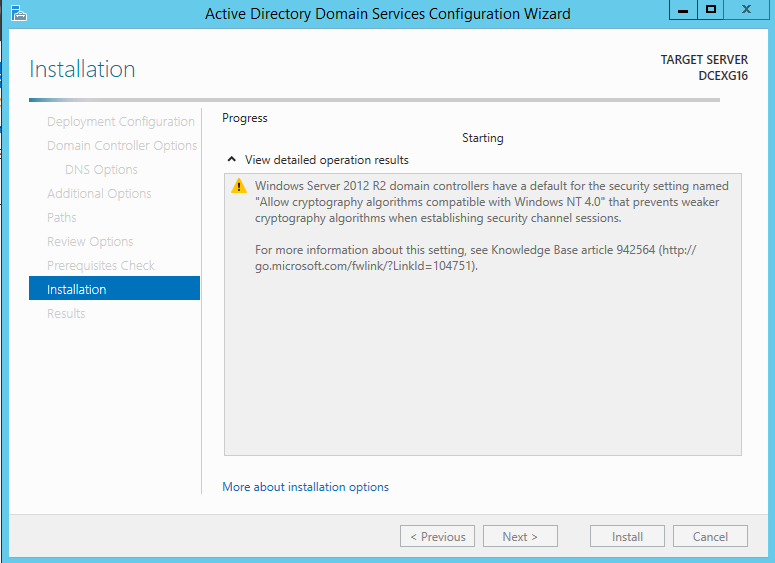
- 19.It might take around 10-15 minute to complete the installation, unfortunately my machine got reboot after the completion of the installation. Couldn’t get with last snap, But I know you guys will see it :D.
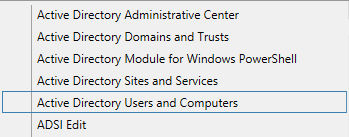
After completion of everything, you guys will see these new things on your Tool menu of server manager.
Hope this will help you guys to configure your Domain Controller. Please leave comment if you do have any queries, will surely try to resolve if there are any.

Bing Wallpaper ::Download
Windows Media Player skin for WINAMP…

Single Sign-On (SSO) with Microsoft Entra: Best Practices and Step-by-Step Implementation Guide
About Author
pdhewjau
Prashant Dhewaju is a Microsoft MVP and Microsoft 365 Adoption Consultant with deep expertise in cybersecurity and modern workplace solutions. He advises organizations across Nepal and the broader region on securely adopting Microsoft 365, improving productivity, strengthening security posture, and driving effective change management. His prior position as a Modern Work Security Specialist at Microsoft saw him providing invaluable guidance to major clients in Bangladesh, Brunei, Cambodia, and Myanmar, assisting them with their foundational security needs. Awarded the esteemed Microsoft Most Valuable Professional (MVP) accolade in 2017, Prashant is recognized globally among Microsoft peers. Since 2010, he has imparted his expertise as a Microsoft Certified Trainer (MCT), conducting specialized training across Nepal.