[How to] Document DLP with Exchange Server
Email has become the Business-Critical application on any of the enterprise. And to secure such infrastructure, there arises a challenge for everyone. If we go with the history of the Microsoft Exchange, since Exchange 2013 Microsoft has enhanced its security feature for the inflow and outflow of the emails. One of the feature for the security enhancement is Document Fingerprint which we will discuss over here today. We will walk-through with the implementation of Document fingerprint on this blog.
Document Fingerprinting is a Data Loss Prevention (DLP) feature that converts a standard form into a sensitive information type, which you can use to define transport rules and DLP policies. For example, you can create a document fingerprint based on a blank patent template and then create a DLP policy that detects and blocks all outgoing patent templates with sensitive content filled in. Optionally, you can set up Policy Tips to notify senders that they might be sending sensitive information, and the sender should verify that the recipients are qualified to receive the patents. This process works with any text-based forms used in your organization. Additional examples of forms that you can upload include:
- Government forms
- Health Insurance Portability and Accountability Act (HIPAA) compliance forms
- Employee information forms for Human Resources departments
- Custom forms created specifically for your organization
Ideally, your organization already has an established business practice of using certain forms to transmit sensitive information. After you upload an empty form to be converted to a document fingerprint and set up a corresponding policy, the DLP agent will detect any documents in outbound mail that match that fingerprint.
Finger print DLP can be mostly useful to the co-operate office and Financial sector, who does not want their internal confidential data may get leak to the outside world without any proper legal method.
To Simulate the feature of the Document Fingerprint, here I have created a sample CV document as a template. Below is the snap-shot of the template which I have created

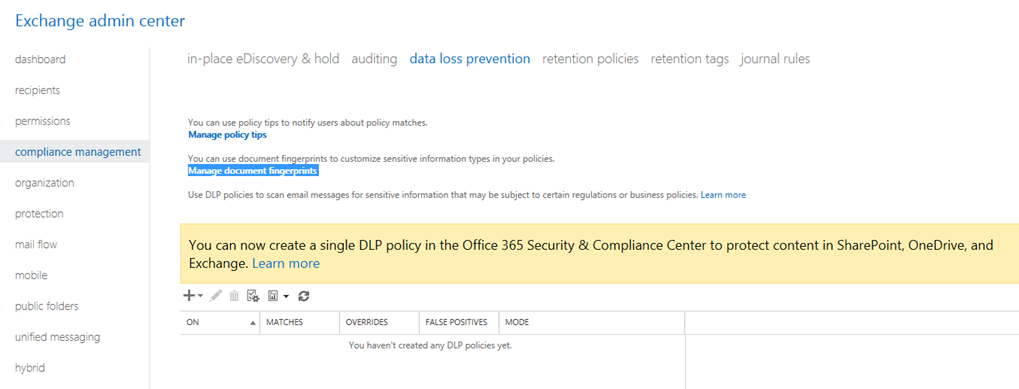
To make sure any document like the template above may not get leaked outside with-out permission of appropriate Manager, Here I am creating one Demo DLP for Document Fingerprint. To create a DLP policy for the Document Fingerprints Go to ‘Exchange Admin Panel‘, Click on ‘Compliance Management’ and Select on ‘Data Loss Prevention‘. On this page, you will see ‘Manage document fingerprints‘ click on it.
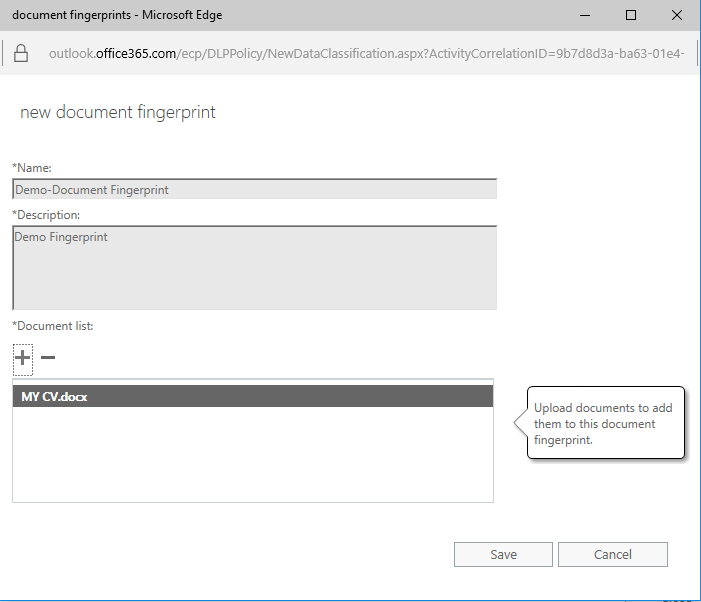
Once you click on the ‘Manage document fingerprints‘ a new window will get open to add a ‘new document fingerprint’ on this document, click on ‘+’.

On add new Document Fingerprint, add the sample document you want to be the template and monitor it. As of the below snap, ‘My CV.docx’ is my sample template document. You can add multiple document at once on it.
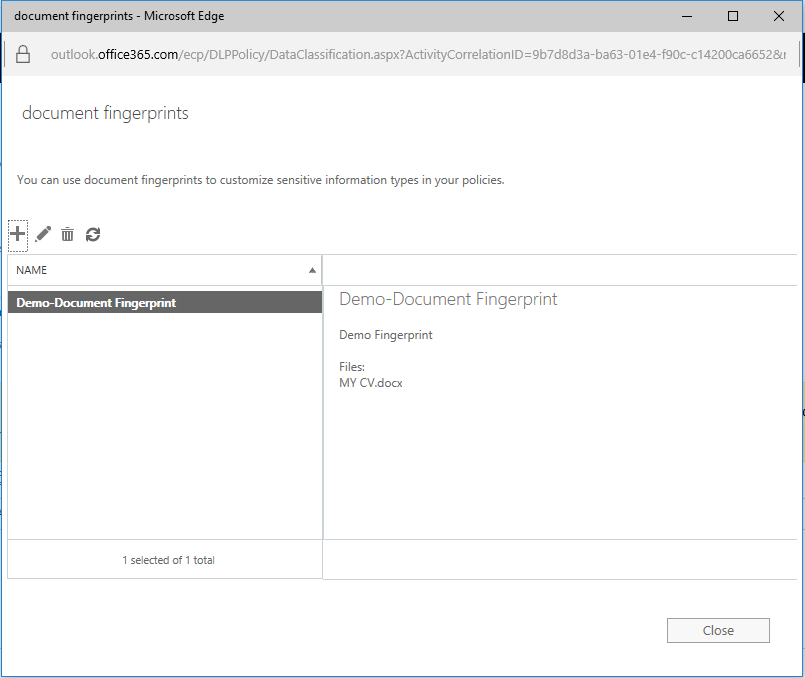
Once you add the required document, as a template. Click ‘Save‘ and ‘Close‘.
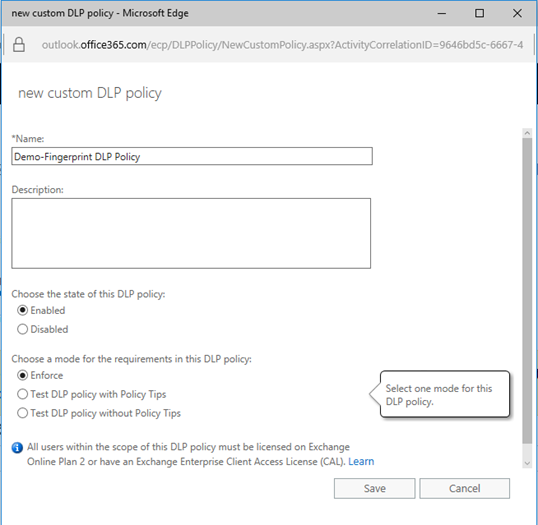
Now the provided template document will act as the sensitive document for any rule on Exchange. So, we need to create a rule for the sensitive document as per the organization requirement. Hence on the ‘data loss prevention‘ page of ‘Exchange admin Center‘, we create a ‘New Custom DLP Policy‘.

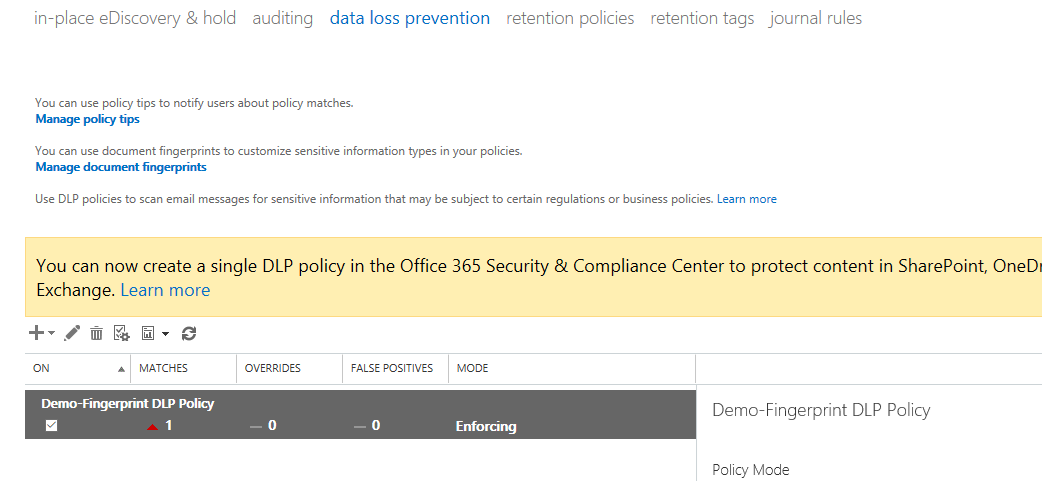
On this ‘New Custom DLP Policy‘. Provided the name of the policy, enabled it and enforced it for my demo purpose. After the configuration is complete, clicked on save
That was the process of just creating the DLP policy, but yet we have not written on these policies. To get write the policy for the sensitive information, double click or click on edit.
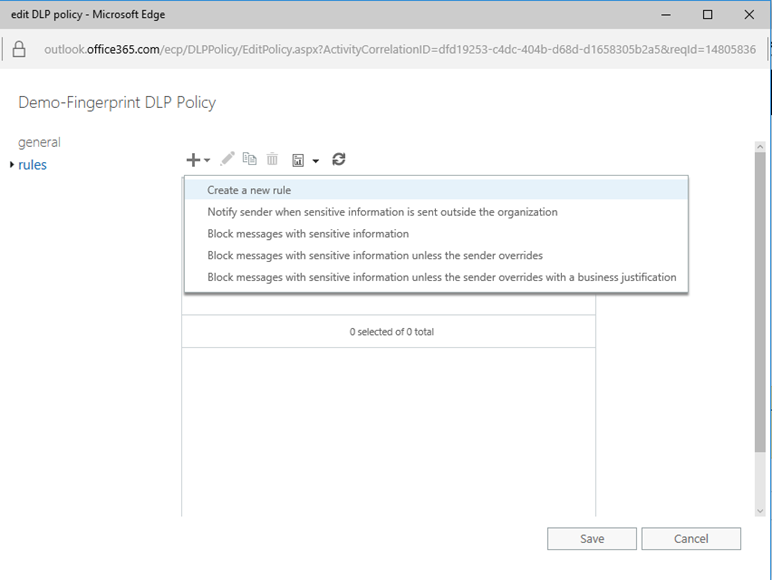
On the Edit page of your DLP Policy, select on ‘rules‘ and create a new rule.
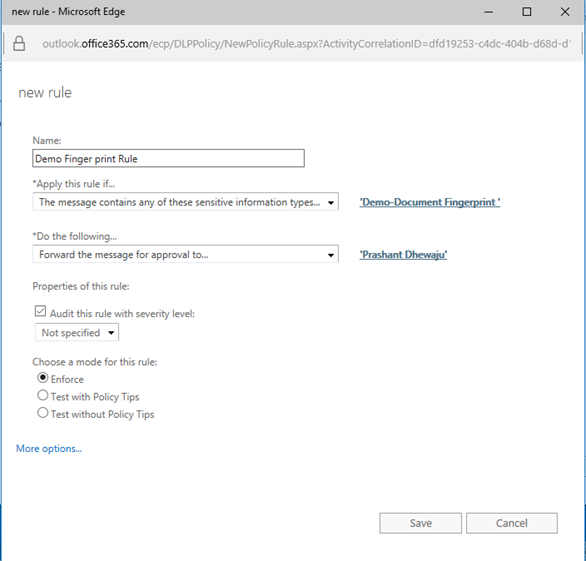
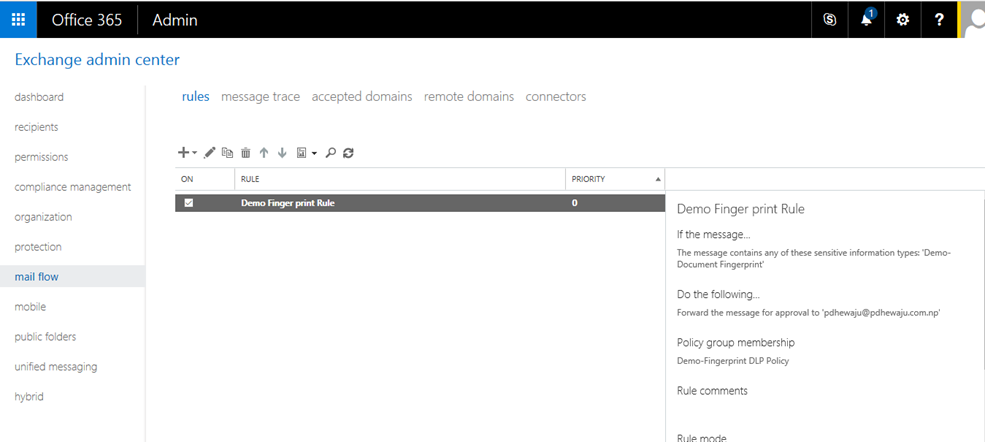
As explained earlier, document which was added as the template will now work as sensitive information types. Hence on the ‘new rule‘ page make a rule as of below snapshot tagging uploaded template document as sensitive information document. Also you can add the user who can approve to allow this mail to flow.
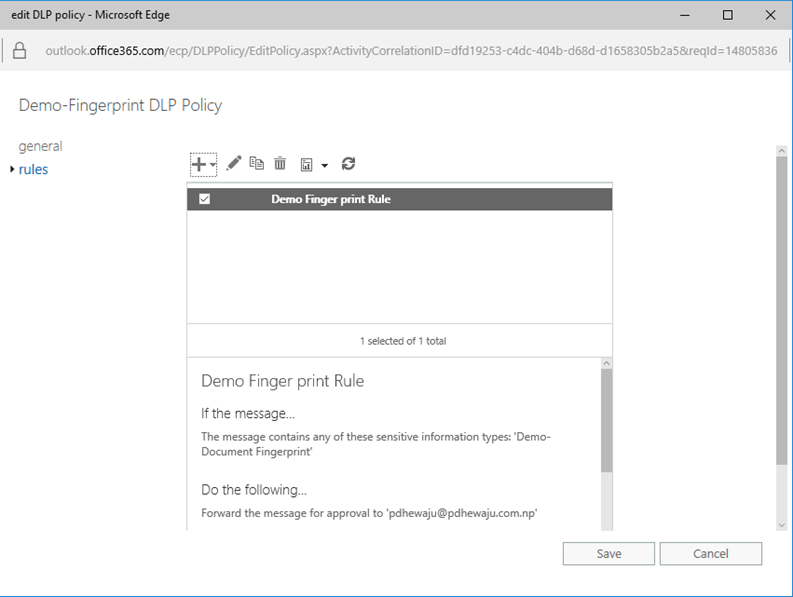
Once the policy is completed, click on Save and close.
When you were creating the DLP policy on the ‘Compliance Management‘ at the same time on the ‘mail flow‘ the same policy is created and linked to each other. On back-end this rule is created with the sensitive information template to protect the organization property. And that was all for the configuration, now let’s see how will it look like when someone tries to send the company Intellectual property outside the organization.
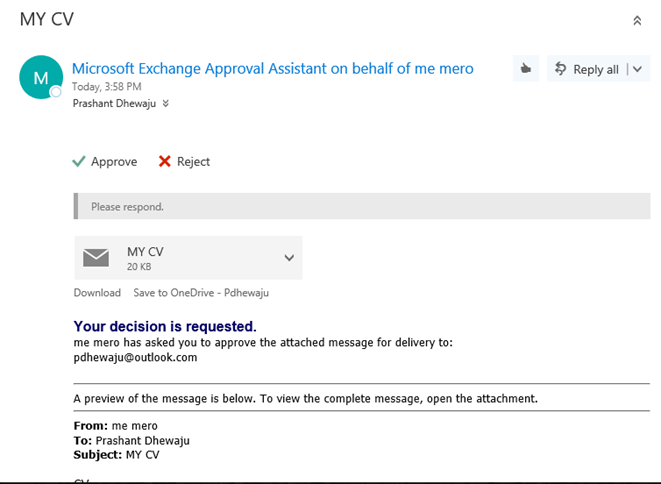
Here is the sample of email, which the administrator has received. According to this email, There is an email send from the user mero to the outsider name ‘pdhewaju@outlook.com’ with an attachment. This attachment contains the sensitive information as per organization policy.
Hope this will help you to secure the organization email. J keep watching there are more coming with the details on exchange feature.

Prevent Themes to Change Desktop Icons & Mouse Pointers in Windows 7
Features of Window Live Messenger Wave 4

Understanding the “Free Copilot is Going Away” Confusion – What It Really Means for Nepalese Organizations
About Author
pdhewjau
Prashant Dhewaju is a Microsoft MVP and Microsoft 365 Adoption Consultant with deep expertise in cybersecurity and modern workplace solutions. He advises organizations across Nepal and the broader region on securely adopting Microsoft 365, improving productivity, strengthening security posture, and driving effective change management. His prior position as a Modern Work Security Specialist at Microsoft saw him providing invaluable guidance to major clients in Bangladesh, Brunei, Cambodia, and Myanmar, assisting them with their foundational security needs. Awarded the esteemed Microsoft Most Valuable Professional (MVP) accolade in 2017, Prashant is recognized globally among Microsoft peers. Since 2010, he has imparted his expertise as a Microsoft Certified Trainer (MCT), conducting specialized training across Nepal.