[step by step]Configuring Exchange Certificate
Another important part of the exchange server is to configure the certificate. Certificate makes the web-based mail access secure as well authenticated and this part is quite recommended on the enterprise level, if we check from the Exchange 2013 all the console is browser based. To configure the certificate on the Exchange server it requires a public certificate with minimum One (1) Subject Alternative Name (SAN) to access mail through public (Internet). Number of SAN depends upon the no. of Domain we use.
Normally after the installation of the Exchange server, if we try to access the browser we see the error as of the below screenshot that has been taken. To avoid this screen, we need to have a public/private certificate. If we are using Private certificate that, this will not work if we try to access email on browser based through internet. But if we do have a pubic certificate, it will allow us secure connection for both public and private network.
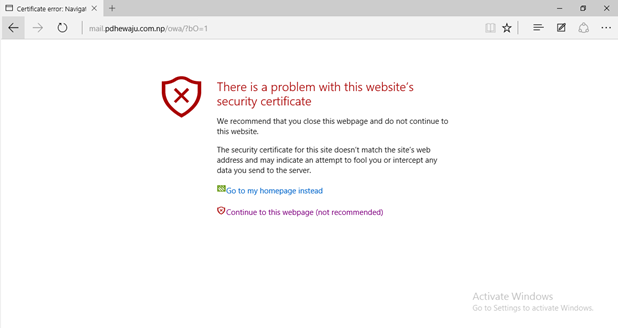
Anyway closing the topic now let’s move with how we can configure and implement certificate on our newly configured exchange server. As a part of Implementing certificate on exchange server, we do have two parts
- Request Certificate
- Import Certificate
To get Request Certificate, we need to open Exchange Control Panel. After Opening getting login on the Exchange Control Panel, Select ‘Servers’ on the left panel of the Browser. Once Browser is selected, different tabs gets appear on the central panel. Click on ‘+’ symbol to request a new certificate on central panel.
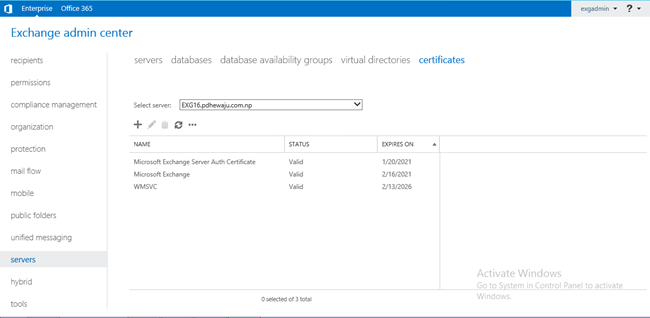
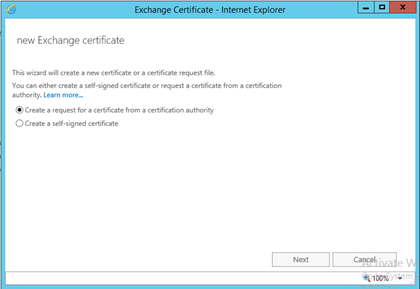
A ‘New Exchange Certificate’ window will get open, two option will get available for the certificate generation
- Create a request for a certificate from a certification authority
- Create a self-signed certificate
As of we are talking about the certificate generation using the certificate server, we will be selecting option 1 to move ahead and click on ‘Next’.
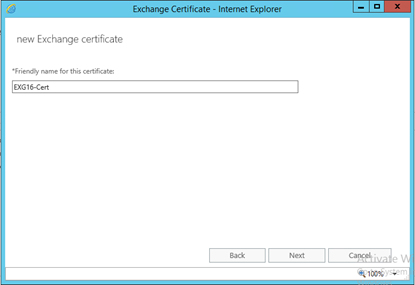
Provide Friendly name to the certificate, so that it would be easy to identify which certificate for what purpose. As of this certificate is to created newly, I have just named it ‘ EXG16-cert’ ad clicked on ‘Next’.
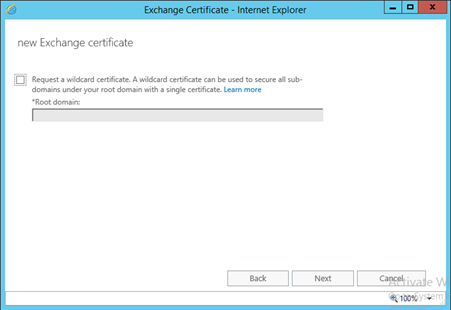
As explained above, on the type of the public certificate numbers of SANs might be required. But in our case, we do not require any wildcard certificate hence left is as default and clicked on ‘Next’.
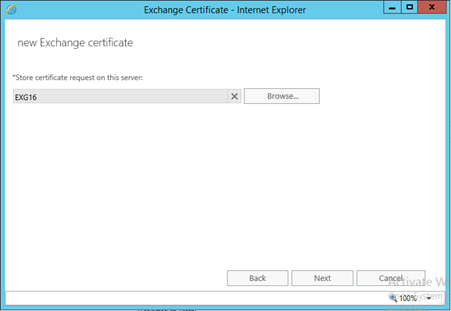
Selected the Server on which we need to store the certificate which we are requesting. Till Exchange 2013 we selected Server with Exchange CAS Role, but in case of Exchange 2016 everything is consolidated on single server, we can select our any Exchange Server. In my Case, I have selected EXG16 as my Exchange server and clicked on ‘Next’.
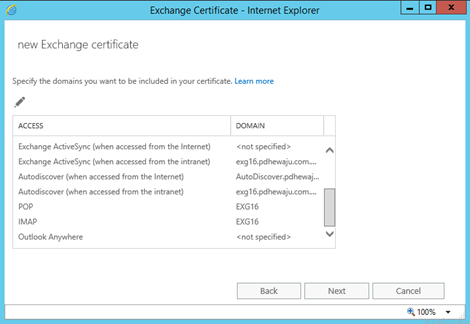
So this part of the requesting certificate provides us an options with how many SANs we need to append with our Certificate. As well what SAN are required for which services. (1 Certificate with 3 SANs Cost = 3 Certificate Cost).
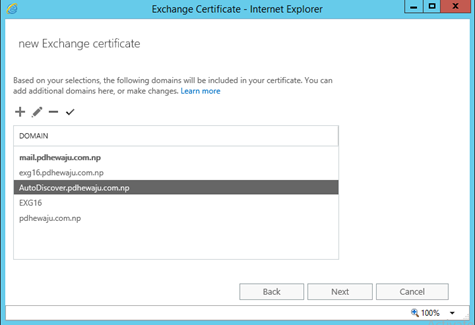
Also on this Window we can add or remove desired certificates. Once it seems ok, we can click on ‘Next’ to proceed ahead.
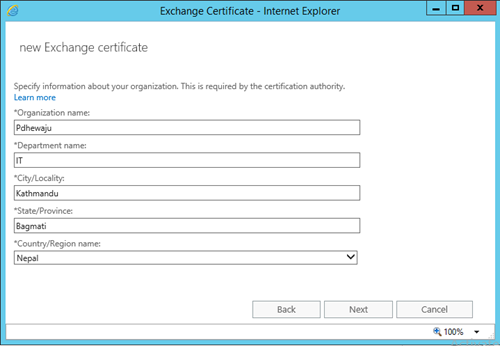
As we are requesting Certificates with X.509, it also required to amend information of certificate requesting party. Once you fill the form, click on ‘Next’.
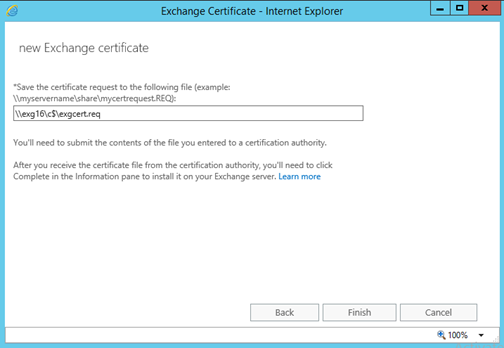
Provide the location where we want to store the certificate request file, as of everything is browser based. We need to provide the location with UNC Path, once the Path is provided click on ‘Finish’.
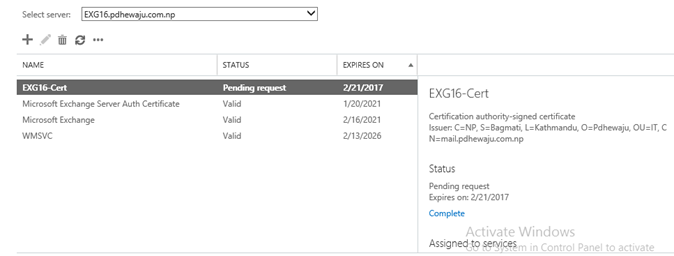
Once the Task of the certificate request complete, you can see your request certificate as pending on Certificate TAB of the server.
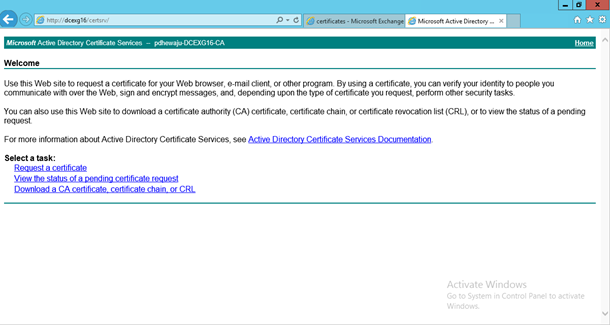
As on my scenario, I do have Certificate server on my lab. I get logon on that certificate server to request the certificate of the exchange, but if you guys are trying to get import it from the public. You can follow same procedure on your public certificate portal. (On my Previous blog I have mentioned how we can Install and configure certificate server on-premises. Click here to visit on that blog.).
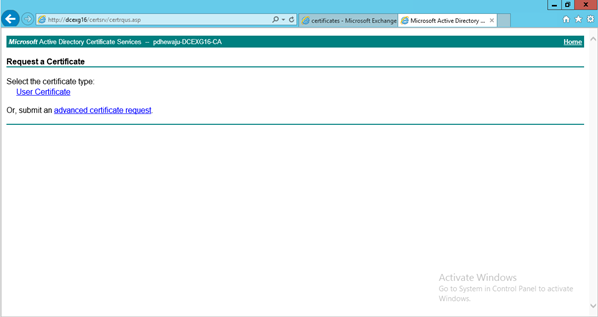
After login into the Certificate authority portal, click on ‘Request a certificate’ to generate certificate from request file.
As we do have request file already create, and need to generate certificate according to the request file. Select on ‘advance certificate request’.
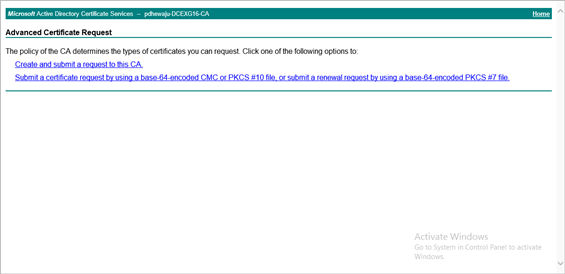
On Advance Certificate Request, select ‘Submit a certificate requires by using a base-64 encoded CMC or PKCS #10 file, or submit a renewal request by using a base-64-encoded PKCS #7 file.’.
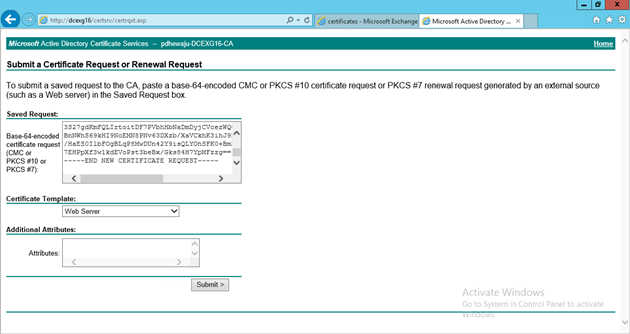
Open the previously create Certificate request file, using Notepad. Copy all the content of Notepad and past on the location ‘Base-64-encoded certificate request (CMC or PKCS #10 or PKCS #7):’ Select Certificate Template as ‘Web Server’ and click on submit.
On this screen, we can select any of the option to download the certificate, but I have selected ‘DER encoded’ and downloaded certificate.
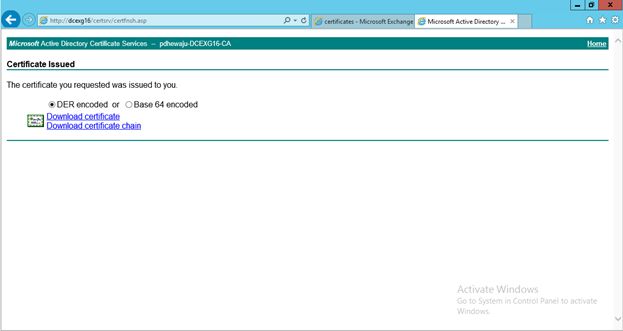
Here the certificate is downloaded and stored.

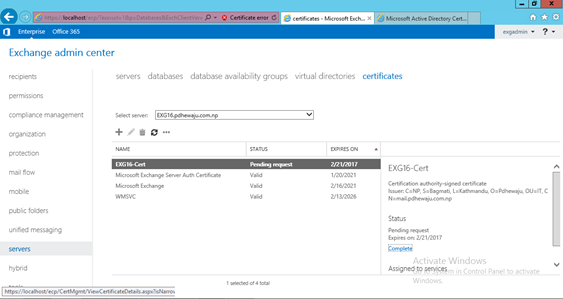
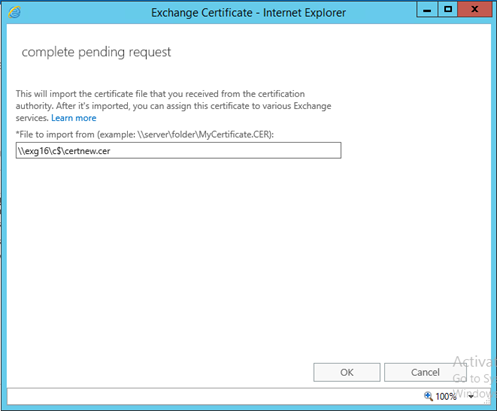
Once the certificate is generated, let’s get back to the Exchange Control Panel (ECP). Where we do have pending certificate. Select the pending certificate and click on ‘Complete’ on right panel to compete the request of the certificate.
Provide the location of the downloaded certificate with UNC.
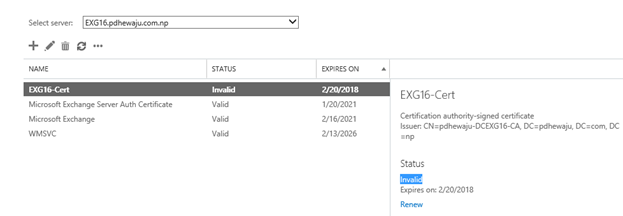
Sometimes even after the importing proper certificate, it shows the INVALID on the status of the certificate. For this we need to import Chain certificate, here I have done same with below snaps.
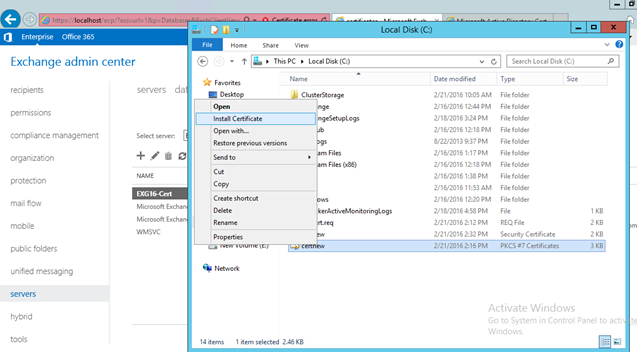
Right clicked on the Certificate Chain and selected ‘Install Certificate’.
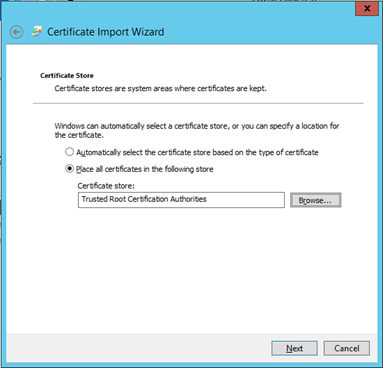
Select ‘ Trusted Root Certification Authorities’ to store the certificate and click on ‘Next’.
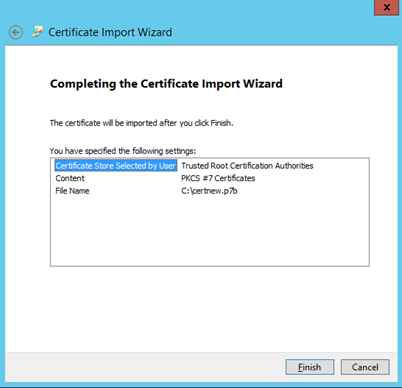
Verify the details and click on ‘Finish’.
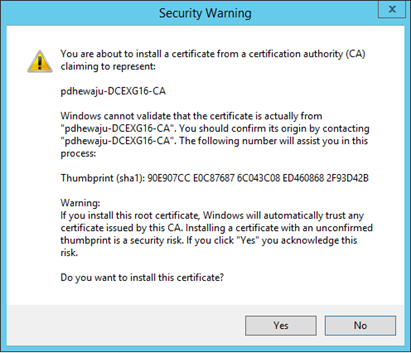
For any Security Warning click on ‘Yes’.
Now if you check the Certificate location, you will see your new certificate as VALID. In case of Public certificate, you need to have PKI.
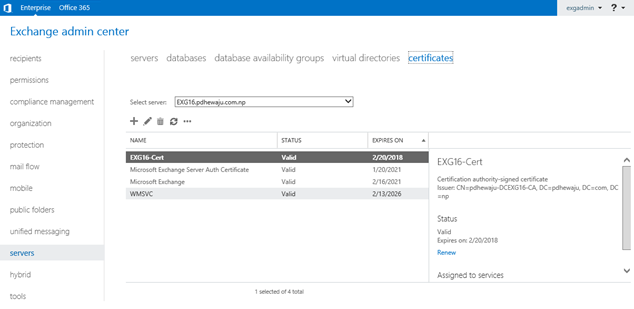
Once the certificate is Valid and OK. Right click on the certificate and select assign to assign services to the certificate. (i.e. SMTP, IMAP, POP, IIS, etc.).
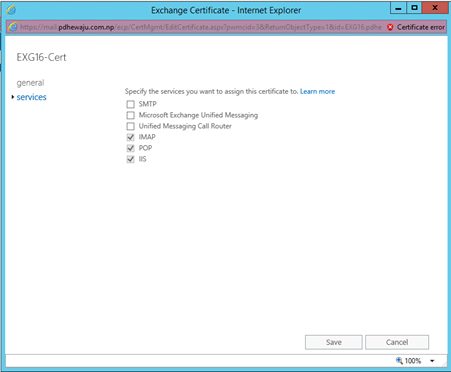
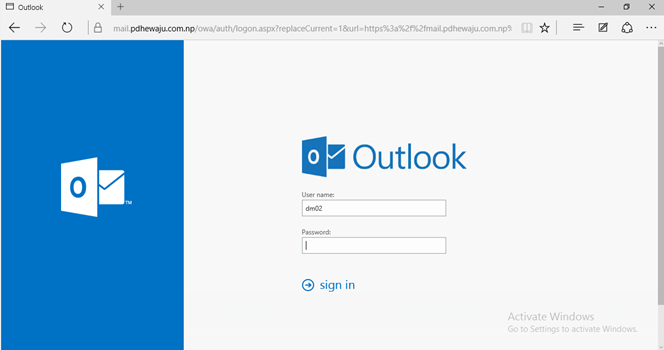
After assigning the certificate to the service, Restart IIS services. Once the IIS Services is started, if you browse your exchange portal now you will see the valid HTTPS portal with no error.
I hope this blog will help you to assign, renew the Exchange certificate quite easily. J
Keep tuning. J Happy Blogging.

